3/31/2011

First version of Route T and Route P


Route P
Route T

To help uses to distinguish between these two versions of circles, we add three elements in our design: color contrast, size contrast and shadow change. In the route P for shopping, we make icons for shops larger yellow circles, while the icons for museums are smaller and grey. When seeing the image, users’ attention will be attracted by the yellow ones, and choose the anti-clockwise direction. Besides, the upper left shadow indicates the light sources comes from bottom right direction and attracts users to choose the anti-clockwise direction. While in route T, elements are entirely opposed, hints for clockwise direction will be more obvious.

In our progress for designing the map, we make several versions and test the function of shadow and color. The color contrast works better than shadow change. Some users even feel nothing about the change of shadow.

3/26/2011

Moive Style

For the movie style, we decided to use the mix of freehand style and time lapse style. Because we draw freehand drawing icons in the design of image, the freehand style movie could help to present our movie. In the user test part, we would use normal video, rather than the time lapse style. The background music would be fast piano.
The following videos will help to understand freehand style and time lapse style.

Freehand style


Time lapse style


The following picture is the drawing movie for our movie.


Icon and Circle Design

The following are icons for museums in Delft.


The following picture is the developed design of Delft circle. The background color block is taken from the previous version of Delft map. The circle takes the metaphor of Delft river, and the museums and shops stands both sides. To make the picture much richer, designer draw foot bridge across the river, which can be seen in Delft Center. Besides, the designer add standard icon of museums and shops beside freehand icons to help users to distinguish between two kinds of icons.

For further design, we also need to give two versions of circle and present rich elements to indicate direction for users.

Sketch for New Circle

From the former presentation, we knew that the requirement of assignment is misunderstood. We are not supposed to make one travel map, but one travel circle. The image should present one perfect circle, to indicate the general direction to travelers who search for shops or museums.

Thus, in the meeting we tried to reconsider our design. We made some sketches and selected one to develop further.

Pearl Necklace

Delft is famous for the portrait “Girl with a Pearl Earring” by Jan Vermeer. We took the metaphor of pearl and chose pearl Necklace to be the circle. Every pearl represented one shop or museum. The images of shop or museum were showed from the pearl, never covering the luster of pearl. The direction was indicated by size and spacing of pearls. While in this concept, images of icons were difficult to handle and time consuming.

Girl with a Pearl Earring
Sketch for pearl necklace

Pie Chart

The most important reason for this concept was that the outline of pie chart was born perfect circle. This pie chart was supposed to be divided into several parts, and each part represented one museum or shop. We planned to use occlusion of to indicate direction. Besides, we planned to draw the name of scenic spots outside the circle. And the shape of name could also indicate the direction.

Sketch for pie chart


Cartoon river circle

We noticed there were rivers in delft centre, and thus we used the image of river to be the circle in this concept. And we wanted to use cartoon style for the whole image. Each icon of shops and museums should be drew by ourselves and present a feeling of childish. Finally, we decided to develop this concept into our final design. Two group members planned to draw icons and river circle while one group member prepared for user test and movie.


Sketch for cartoon river circle

3/15/2011

Concept presentations-Group P

Morning!


Design Specifications& Rough Ideas
-indicate directions
(clockwise, anticlockwise)
-make icons pop out
-make distinctions between “route K”& “route P”
-give enough efficient information


Concept Description
1.Theme


2.Distinction
2.1 map& icons


2.2 center area


2.3 Icons-K&P
-graphic & buildings, photos


-color-coding


3. Directivity
-gradient color


-circle
-starting point


-route signs’ orientations


Things should be improved.
1.Text of buildings& Roads


2.The result of icons does not fit our idea so well -“run up the stairs”
-Should we move the icons on the circle?
-Change the form of icons?


3. Elements should be added and adjusted. In order to correspond with the
theme. The theme is not well illustrated.


Thank you.

3/13/2011

Sketch for map


The first picture shows the sketch for our design. We simulate the image of contradictory stairs in our map. Stairs present feeling of guiding people, thus we can use stairs to imply direction. The whole map is drawn in 2.5 dimensions. We use two colors in the map: blue and orange. They are contrast color and user can distinguish between them easily. Thus the circle is drawn by two colors. Besides, all the icons are separated by these two colors two. Therefore users can find the group of icon: museums or shops. Two groups of icons face two directions, which help people to distinguish between them. The circle and icons might be added with shadow. The style for the whole map is Delft-Blue. Delft-Blue is the symbol for this city, and we can create some pattern of delft-blue in the corners of the map to make the map more unique.

3/11/2011

Primary treatment for maps

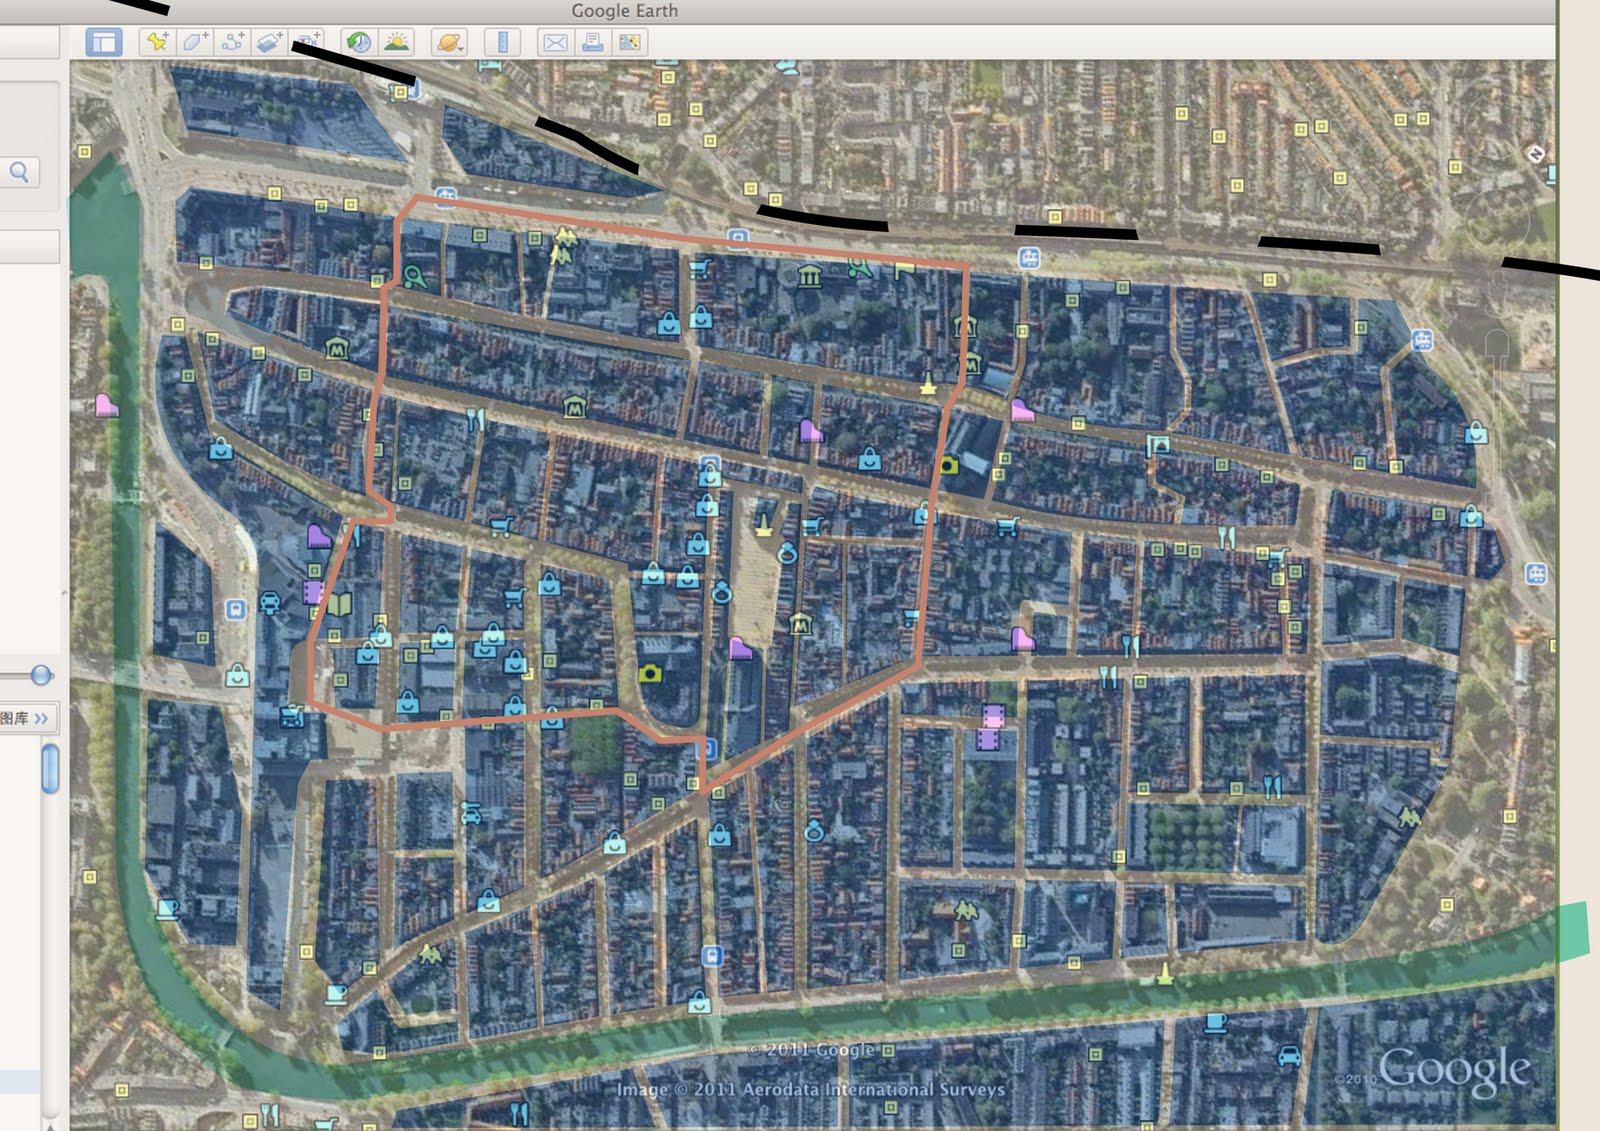
These following maps show the procedure of creating frame for the whole map.

The source comes from Google Map. At the beginning, we regard that main roads should be paid attention. So we only mark main roads in the map with faint yellow. Then we mark the river with pale green and mark the railway with black. To help improtant area catch visitor's attention, we cover important areas semi-transparent blue and cover unimportant frontier area with semi-transparent white. Thus visitors won't be disturbed by the frontier area. Besides, the circle is marked with gray orange. Finally, all shops and museums are marked with icons from Google Map.

Then we use color block to present the map. The blank during blocks stands for main roads. The river, railway and important areas are marked with different colors, while other parts are hidden. Thus the map is clear than the former one.

The circle is marked in this map.


Then shops and museums are marked in the simplified map. The yellow spots represent museums while the blue spots represent shops. We can use these two maps for two versions in our next step design.